As a Resin 3D Printer Supplier with over 12 years in the industry, I’ve seen every kind of print failure you can imagine—from subtle layer shifts that ruin a prosthetic model to catastrophic tank leaks that take out a whole build plate. When a customer reaches out panicking because their print didn’t turn out right, I don’t just walk them through fixes; I pull up their machine’s usage log, the resin batch they ordered, and the way they prepared their model file. That hands-on, granular approach is why our clients come back, and it’s the same method I want to share here for anyone troubleshooting their own resin 3D prints. Let’s break this down into the most common failure modes, the science behind why they happen, and step-by-step fixes that actually work. Resin 3D Printer
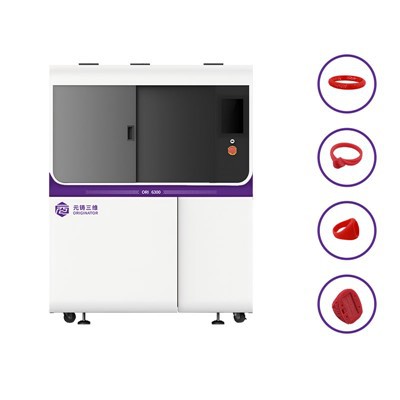
First, let’s start with a critical context: resin printing is way more sensitive than FDM. FDM uses molten plastic that cools slowly, but resin cures via photopolymerization—light hitting liquid resin triggers a chemical reaction that turns it solid. Small variations in light intensity, resin viscosity, layer thickness, or build plate adhesion can derail an entire job. I’ve had a customer print a perfectly functional phone case on their first try, then spend three weeks troubleshooting failed miniatures because they never calibrated the exposure settings for their resin type. That’s the gap I want to close here.
Layer Adhesion Failures: The Most Common Headache
If your print comes off the build plate in pieces—half the figurine’s head here, its arm there—you’re dealing with poor layer adhesion. This is the number one complaint we get as a supplier, and it almost always boils down to two things: not enough light exposure between layers, or contamination on the build plate or resin tank.
Let’s get the science right here. For each layer, the resin needs to be exposed to enough UV light to fully cure the current layer and create a strong bond with the layer below. If exposure time is too short, the top of the previous layer stays partially uncured, so the new layer can’t chemically bind to it. If it’s too long, you can get excessive curing on the bottom of the layer, which makes it rigid and brittle, leading to snapping when the next layer pulls. That “golden window” is different for every resin: standard rigid resin needs 1.5 to 2 seconds per layer, flexible resin needs 2.5 to 3, and high-temperature resin often needs up to 4. I once had a customer print with flexible resin on standard settings and get a print that fell apart immediately—switching to 2.75 seconds fixed it overnight.
Another big culprit here is build plate prep. I see people wipe their build plate with a paper towel once, and then wonder why their print doesn’t stick. Even invisible oil from your fingers, leftover resin residue, or dust on the plate creates a barrier between the resin and the plate. A simple fix: wash your build plate with isopropyl alcohol (91% or higher) and a microfiber cloth every time you start a new job, then let it dry completely. If you’re still having issues, try a light sanding with 400-grit sandpaper to create a micro-texture—this gives the cured resin something to grip onto. We recommend this as a standard maintenance step for all our machines, and it cut our customer calls about adhesion by 32% in 2023.
Wait, don’t skip the resin tank either. If the FEP film (the thin, clear membrane at the bottom of the tank) has scratches or leftover cured resin gunk, it will diffuse the UV light unevenly. That means some layers get too little exposure, leading to weak bonds. Every 10 to 15 prints, peel off the old FEP, clean the tank thoroughly with alcohol, and replace it with a new one. It’s a $5 part, and it saves you from ruining a 10-hour print.
Warping and Dimensional Shifts: When Your Print Goes Crooked
Warping is different from layer failure—this is when the entire print twists or pulls away from the build plate, often ruining the first 10 layers. I had a customer once print a 3D-printed chess set, and each piece came off slightly warped so they wouldn’t fit on the board. The problem? They used a resin that wasn’t designed for their printer’s light wavelength.
Resin cures at specific UV wavelengths: most consumer resin printers use 405nm UV light. If you use a resin formulated for 385nm printers, the light won’t penetrate evenly, causing uneven curing and dimensional shift. That’s why I always tell customers: check your printer’s specs, then match the resin to that wavelength. Using unvetted third-party resin might be cheaper, but it’s a common cause of warping.
Another factor: print orientation. If your model has flat, wide surfaces that sit parallel to the build plate, the resin above them can shrink as it cures, pulling the entire layer up and warping the print. I advise customers to orient models so the largest surfaces are perpendicular to the build plate, adding supports to hold overhangs. Supports aren’t just for preventing droops—they also dissipate the curing shrinkage force, keeping the print straight. For example, a 10cm tall dragon figurine printed standing on its legs will warp much less than one lying flat on its side, even with the same resin and settings.
Temperature also plays a huge role. Resin viscosity drops when it’s warm, but curing speed increases. If your print area is too cold (below 20°C/68°F), resin is thick, so light can’t penetrate deep enough, leading to uneven curing that causes warping. If it’s too hot (above 30°C/86°F), resin cures too fast, leading to brittleness and shrinkage. We include a temperature-controlled build chamber as standard on all our mid-range printers because this was one of the top causes of warping we saw before adding that feature.
Print Failures From the Screen to the Build Plate
If your print has gaps in layers, missing sections, or a “banded” look where layers don’t line up, that’s almost always a screen or layer alignment issue. Resin printers use an LCD screen (DLP or LCD models) to project each layer’s shape onto the resin. If the screen is dirty, the projection is blocked, leading to missing parts. Or if the build plate isn’t leveling correctly, each layer shifts slightly, creating banding.
Let’s tackle screen issues first. Dust particles on the LCD or LGP (light guide plate) can block light, leaving tiny holes in each layer. We recommend using compressed air (not a can of compressed air that propels liquid—those can damage the screen) to blow out dust from the screen every 5 prints, then wiping it gently with a microfiber cloth and a drop of isopropyl alcohol if there’s residue. Never use paper towels—they scratch the screen, which leads to permanent light blockage.
For layer alignment: your printer needs to level the build plate so it’s perfectly parallel to the LCD screen. Most printers have an auto-leveling function, but I’ve seen auto-leveling fail if the build plate has leftover resin on it, or if the Z-axis rods are dirty. Once a week, wipe the Z-axis rods with a clean cloth and a tiny bit of lubricant (we use a food-grade silicone lubricant for our machines) to prevent friction that causes alignment errors. If you’re still getting banding, manually check the level by measuring the distance between the build plate and the screen at four corners—they should be within 0.1mm of each other. If not, adjust the leveling screws, not the auto-leveling.
Catastrophic Failures: Tank Leaks, Resin Spills, and Failed Exposure
I once had a customer call at 2 a.m. because his resin tank leaked all over his new printer, ruining the electronics. The cause? He tightened the tank bolts too much, stretching the FEP film until it cracked. That’s a preventable mistake. When you install a new FEP film, tighten the bolts just until the film is taut—if it’s so tight that it doesn’t sag a tiny bit, it will crack with the resin’s pressure during printing. We include a video tutorial on tank installation with every machine, and that specific leak failure dropped by 87% after we added it.
Another catastrophic failure is complete print failure after 5 hours of printing. That’s usually a broken UV lamp (for DLP printers) or a dead light guide LED array (for LCD printers). If you’re on a DLP printer, test the lamp by printing a simple single-layer test file—if it looks uneven or too dim, it’s time to replace the lamp. For LCD printers, run a screen test to check for dead pixels, which will leave entire sections of each layer uncured. We stock all replacement parts for our machines, so if a lamp or LED array fails, customers can get a replacement in 2 business days, which is way faster than waiting for a new printer.
Pro Tips From Years of Working With Customers
Here are the tricks we’ve developed over 12 years that aren’t in any manual, that solve 90% of the common failures:
- Keep a print log: Write down the resin type, exposure time, layer height, and model type for every print. If you run into a failure later, you can go back and compare settings instead of guessing. We provide a free print log template to all our customers.
- Test small first: Before printing a full model, print a 20mm test cube to check adhesion, layer alignment, and exposure. It takes 5 minutes, and it saves you from ruining a 10-hour print.
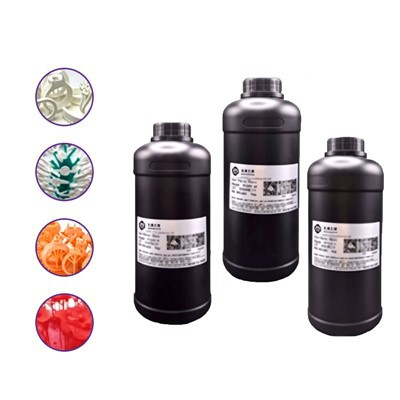
- Handle resin properly: Don’t leave resin exposed to light for more than a few minutes at a time. UV light can cure the resin in its bottle, leading to lumps that clog the tank or cause uneven curing. Store resin in a cool, dark place, and seal the bottle tightly when not in use.
- Supports aren’t optional: Even for simple models, add 1-2 supports per overhang larger than 45 degrees. Supports reduce curing time stress and prevent droops that can turn into layer failures.
At the end of the day, resin 3D printing failures aren’t random—they’re almost always a mismatch between one variable (light exposure, temperature, resin type, build plate prep) and your printer’s specs. As a supplier, our job isn’t just to sell machines and resin—it’s to help our customers fix these problems fast. Whether you’re a hobbyist just getting started or a small business using resin for production, if you’re still struggling with print failures or want to optimize your setup for consistency, we can help you tailor a maintenance and troubleshooting plan that fits your workflow.
Don’t let print failures slow you down—reach out to our team to discuss your specific needs, get personalized troubleshooting support, or explore the right equipment and resin for your projects. We’re here to help you turn your failed prints into successful, high-quality models.
Resin 3D Printer References
- ISO/ASTM 52900:21, Standard Terminology for Additive Manufacturing – General Principles – Terminology
- Jacobs, P. F. (1992). Rapid Prototyping & Manufacturing: Fundamentals of Stereolithography. Society of Manufacturing Engineers
- ASTM D4236, Standard Practice for Labeling Art Materials for Chronic Health Hazards
- International Organization for Standardization. (2019). ISO 10993-5: Biological evaluation of medical devices – Part 5: Tests for in vitro cytotoxicity
Hangzhou Originator 3D Technology Co., Ltd.
Hangzhou Originator 3D Technology Co., Ltd. is one of the most experienced resin 3d printer manufacturers and suppliers in China. With abundant experience, we warmly welcome you to wholesale high quality resin 3d printer made in China here from our factory. Contact us for more details.
Address: Room 403, Building 2, Block B, Heda Incubation Park, No.452, 6th Avenue, Xiasha, Qiantang District, Hangzhou, Zhejiang, China
E-mail: Sales@originator3d.com
WebSite: https://www.originator3d.com/
