If you’ve ever held a drink bottle, a laundry detergent jug, or even a disposable food container that has a smooth, glossy label that doesn’t peel off—chances are that label’s an in-mold label (IML). As someone who’s spent the last decade supplying IMLs to brands big and small, I get it: when a first-time customer reaches out asking “how do you actually print on these things?” it’s not just curiosity. They’re tired of generic labels that scratch, fade, or fall off in the dishwasher, and they want to make sure the IML process is worth the extra step. No, printing on in-mold labels isn’t the same as slapping a sticker on a box or running a sheet through your home printer. It’s a precision process, and I’m gonna break it down like I’d explain it to a new packaging intern—no stuffy jargon, no skipped steps. Let’s dive in. In-Mold Labels
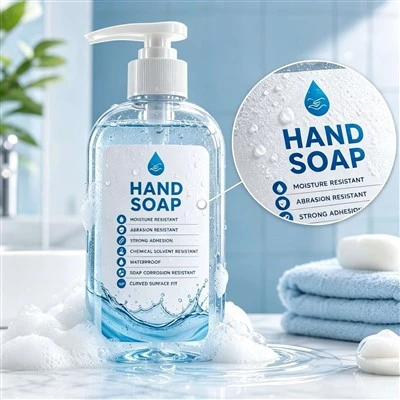
First off, let’s start with what an IML actually is, because if you don’t get the basics, you’ll get lost in the printing part. An in-mold label is a thin, flexible film—usually polypropylene (PP) or polyethylene (PE), sometimes PET for higher-heat uses—designed to be placed inside a mold before plastic is injected or thermoformed. When the plastic melts and fills the mold, the label fuses right to its surface, so there’s no gap, no edge to peel, no lamination required. That’s why IMLs are such a big deal for brands: they look cleaner, last longer, and cut down on production time. But here’s the catch: the printing has to be perfect before the label ever touches the mold. If the print smudges, fades, or shifts, the whole part is ruined. That’s where my job comes in. I’ve seen so many brands mess this up by trying to use the same old flexo printing they use for regular stickers, and it’s a disaster.
Let’s talk about the main printing methods we use for IMLs, because this is make-or-break. From my experience, 90% of IMLs are printed with either rotogravure (gravure for short) or digital printing, and each has its place. Let’s start with gravure, since it’s been the workhorse of our industry for decades, and for good reason. Gravure uses small, etched cells on a copper cylinder—think of it like tiny, precise wells that hold ink. The cylinder rolls over the film, picks up ink, a scraper (called a doctor blade) wipes off the excess, and the ink that’s left in the cells transfers directly to the IML film. Why is this the go-to for large orders? Because it’s super consistent, the ink layers are thick, which makes colors pop, and it’s way cheaper per unit when you’re printing 10,000 or 100,000 labels. I’ll be honest, though: it’s not for small runs. The setup cost for the gravure cylinders alone can run into the thousands, so if you only need 500 labels for a new prototype, gravure isn’t worth it.
Then there’s digital printing, which is blowing up in the IML space right now, and it’s my personal favorite for small to medium runs. Digital printing works like your home printer, way bigger and more high-tech, obviously. You send the design straight to the printer, no cylinders, no setup, and it deposits ink directly onto the film. The big win here is flexibility: if you need to change the design slightly for a new product line, or even print unique QR codes or batch numbers on every single label, digital makes that easy. I had a client last year who makes specialty craft beer and needed unique labels for each brew batch—gravure would’ve taken weeks to set up, but we printed their entire order in 3 days with digital. The only downside? For huge runs (like 500k+), digital can be more expensive per label than gravure, since the ink layers are thinner, so colors might not hold up as well in harsh conditions like hot dishwashers or freezing cold freezers.
Now, before you even load a single film roll into the printer, there are a bunch of pre-press steps that most new customers skip, and that’s why their prints end up garbage. Let’s break that down. First, your design has to be made specifically for IMLs, not regular labels. Wait, what does that mean? Oh, right—when the label goes into the mold, it’s going to be stretched, right? For a bottle or a container, the plastic is under tension as it forms, so your design has to account for that stretching. If you design a logo that’s 2 inches wide flat, when you stretch it to a 5-inch bottle, it’ll be warped, blurry, or the text will be unreadable. My team always tells clients: design your flat artwork with 10-15% extra “pull” space. We’ll adjust the file for you, but if you send us something not prepped, we have to tweak it, and that can cause delays.
Next, ink choice is non-negotiable for IMLs. You can’t just use any old ink. Because the IML is going to sit in a mold with hot plastic (injection molding is usually 350-500°F), the ink has to be heat-resistant. If it melts or smudges when the plastic is injected, that’s a huge mess. Also, if the product is going to be in a wet environment—like a food container that goes in the fridge or a drink bottle that sweats—the ink has to be water-resistant, too. We use UV-cured inks for most IMLs, because they cure almost instantly when exposed to UV light, so there’s no smudging during printing, and they hold up way better to heat and moisture than regular solvent-based inks. I learned that lesson the hard way early in my career: I supplied a batch of IMLs to a client that used cheap solvent ink, and within a month, their labels were fading after being run through a commercial dishwasher. We had to cover the cost of reprinting, and that almost lost us the client. Never again—ink choice is non-negotiable.
Then there’s the actual printing run, and you have to watch for stuff that’s easy to miss. First, film preparation. The IML film has to be completely clean before printing—any dust, oil, or lint on the surface will make the ink not stick, leading to spots or gaps in your design. We run every roll of film through a static eliminator before it goes into the printer, because static is a big culprit here: it makes the film stick to the printer rollers, causes it to feed unevenly, and makes the print shift. If the film feeds 0.1 mm off center every time, by the end of a 10,000 label roll, your design will be way off. That’s why we have quality checks every 500 labels during the run—we stop, pull a sample, check the alignment, the color density, any smudges, and adjust the printer settings if needed.
Wait, and for gravure printing specifically, there’s a thing called color calibration that you can’t skip. The etched cells on the gravure cylinder have to be the exact size to hold the right amount of ink to get your color right. If a cell is just a tiny bit bigger, your red will be too bright; if it’s smaller, it’ll be dull. We use a spectrophotometer every time we set up a gravure run, so we can match the exact Pantone color the client wants. I’ve had clients come to me with a “perfect sample” of a competitor’s label, and we can duplicate that color exactly using the spectrophotometer. No more “close enough” colors—brands need their logo to look identical every time, right?
Once the printing is done, there’s another step that’s just as important as the printing itself: post-print inspection and finishing. No, you can’t just roll up the printed film and send it off to the molder. We run every single roll through a vision system that scans for defects—smudges, missing ink, misalignment, scratches. It sounds overkill, but I’ve seen a batch of 20,000 labels get rejected because a 1 cm scratch was in a critical spot right where the logo goes. The molder doesn’t have time to sort through bad labels, so we have to catch those before they leave our warehouse.
Then, depending on the application, we might add a protective overcoat. For labels that are going to be on food containers or products that get a lot of handling, a clear UV overcoat adds extra scratch resistance and makes the colors pop even more. For labels that go into freezers, we use a matte overcoat to prevent fogging when the label gets cold and wet. It’s all about matching the overcoat to what the client needs.

I know this sounds like a lot, and if you’re new to IMLs, it’s easy to feel overwhelmed. That’s why I always tell new clients to not just look for a cheap supplier—look for someone who will walk you through every step. A lot of suppliers will just take your design and run it, and then blame you if it doesn’t work with their process. We don’t do that. For example, last quarter we had a small skincare brand that wanted to test IMLs for their new serum bottles. They only needed 1,000 labels, so we used digital printing, we walked them through how to prep their design for stretching, we sent them a sample to approve before the full run, and we even helped them coordinate with the molder to make sure the label placement was correct. They ended up reordering 50,000 labels a few months later.
Foil / Embossed Labels Here’s the thing: printing on IMLs isn’t rocket science, but it’s not like printing regular labels either. It requires attention to detail, the right equipment, and a supplier that knows the ins and outs of the process. Too many brands jump into IMLs thinking it’s the same as pressure-sensitive labels, and they end up with a product that’s full of defects, delays, and extra costs. That’s why we’re here—to make that process as easy as possible for you. If you’re thinking about switching to IMLs, or you’ve tried it before and had a bad experience, we’d love to walk through your project, answer all your questions, and give you a free quote tailored to your needs. No pressure, no fine print, just straight talk about what works and what doesn’t.
References
- Sorrentino, L., et al. (2020). “In-Mold Labeling Technology: A Review of Materials, Processes, and Applications.” Journal of Plastic Film & Sheeting.
- American Society for Testing and Materials (ASTM). (2018). “Standard Guide for In-Mold Labeling of Thermoplastic Parts.” ASTM International.
- Gravure Association of America (GAA). (2021). “Best Practices for Gravure Printing of Flexible Packaging Films.” GAA Technical Bulletin.
- Digital Printing Federation (DPF). (2022). “Digital Printing for In-Mold Labels: Advantages and Limitations for Small-to-Medium Runs.” DPF Industry Report.
SpeedPrint Era (Xiamen) Digital Co., Ltd.
SpeedPrint Era (Xiamen) Digital Co., Ltd. is one of the most professional in-mold labels manufacturers and suppliers in China, featured by quality products and low price. Please rest assured to wholesale advanced in-mold labels made in China here and get quotation from our factory. We also accept customized orders.
Address: Floor 1, No. 27, Xianghong Road, Xiang’an District, 361101, Xiamen, Fujian, China
E-mail: hxmacka@gmail.com
WebSite: https://www.lumolabels.com/
